


Zero
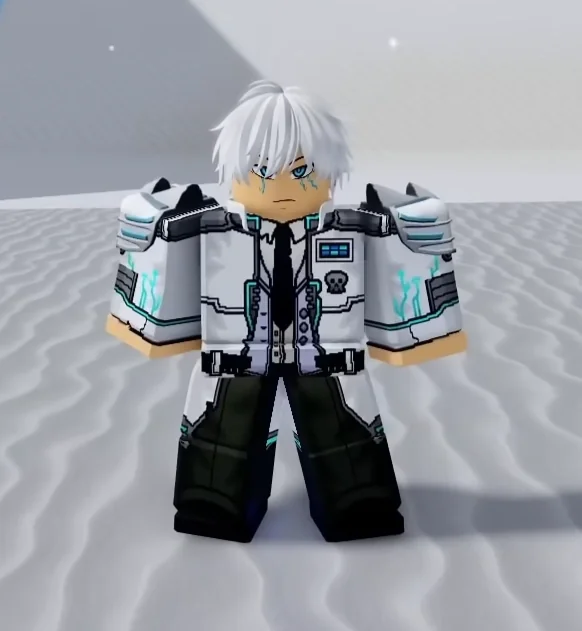
Zero is a Lv. 5000 Dungeon Raid Boss designed as a high level challenge for experienced players. Its level places it among the strongest dungeon encounters, requiring strong builds, good timing, and knowledge of boss mechanics to defeat.
Location:
Zero is found on the 20th floor of a dungeon on Hard mode, where he serves as the final boss encounter before players complete the dungeon and collect their rewards. This does not apply to Challenge difficulty, where the dungeon continues beyond this point.
Tips:
Use ranged attacks whenever possible, as Zero deals extreme damage at close range. During attack animations, Zero remains stationary for extended periods, creating safe openings where players can deal damage without needing to risk getting close.
Zero
Abilities
Zero uses abilities based on the Control Fruit.
Zero starts the fight by creating a Control field that covers most of the arena.
The field limits the available safe space, leaving only the corners outside its range.
Players must position themselves carefully to avoid being trapped inside the affected area.
Attack Zero shortly after the animation ends, as he becomes vulnerable during this brief opening.
This ability does not repeat because the room continues indefinitely after it is used, making the vulnerability window a reliable chance to deal damage.
Zero creates a large forward slash attack by expanding a hitbox before dashing through the arena.
The attack moves in a straight line and damages players caught in its path.
Avoid standing in front of Zero while the hitbox expands to prevent being hit.
Move to the sides or behind Zero to avoid the dash.
Stay out of Zero's attack range to avoid taking unnecessary damage.
Use ranged attacks when possible to safely deal damage from a distance.
Zero teleports to an elevated position and charges a targeted slash attack before striking a marked area on the ground.
The attack has a short charge-up time, giving players an opportunity to move away.
Multiple slashes are combined and launched toward the targeted crosshair location.
Avoid standing on the marked area when the attack is released.
Stay out of range to avoid the slashes.
If hit by the normal version, the attack can be avoided using Instinct.
Be careful of the combined version, as it eventually bursts and breaks Instinct even though the initial slashes can be avoided.
Zero gains a second phase after respawning, where he periodically summons floating cubes around the arena.
The cubes appear at intervals and create additional hazards during the fight.
Players must manage the extra obstacles while continuing to avoid Zero’s attacks.
This phase begins when Zero returns at around 50% HP.
Destroy the cubes as quickly as possible to reduce additional hazards during the fight.
Use attacks with Destructible Physics to break the cubes, as normal attacks may not work.
Zero moves around the arena frequently, making his position unpredictable during the fight.
His movement can make it harder to land close-range attacks.
Players should use ranged attacks or wait for openings when approaching him.
Stay alert and be ready to react to Zero’s attacks and changing fight conditions.
Keep your distance and look for safe openings to deal damage.
Zero starts the fight by creating a Control field that covers most of the arena.
The field limits the available safe space, leaving only the corners outside its range.
Players must position themselves carefully to avoid being trapped inside the affected area.
Attack Zero shortly after the animation ends, as he becomes vulnerable during this brief opening.
This ability does not repeat because the room continues indefinitely after it is used, making the vulnerability window a reliable chance to deal damage.
Zero creates a large forward slash attack by expanding a hitbox before dashing through the arena.
The attack moves in a straight line and damages players caught in its path.
Avoid standing in front of Zero while the hitbox expands to prevent being hit.
Move to the sides or behind Zero to avoid the dash.
Stay out of Zero's attack range to avoid taking unnecessary damage.
Use ranged attacks when possible to safely deal damage from a distance.
Zero teleports to an elevated position and charges a targeted slash attack before striking a marked area on the ground.
The attack has a short charge-up time, giving players an opportunity to move away.
Multiple slashes are combined and launched toward the targeted crosshair location.
Avoid standing on the marked area when the attack is released.
Stay out of range to avoid the slashes.
If hit by the normal version, the attack can be avoided using Instinct.
Be careful of the combined version, as it eventually bursts and breaks Instinct even though the initial slashes can be avoided.
Zero gains a second phase after respawning, where he periodically summons floating cubes around the arena.
The cubes appear at intervals and create additional hazards during the fight.
Players must manage the extra obstacles while continuing to avoid Zero’s attacks.
This phase begins when Zero returns at around 50% HP.
Destroy the cubes as quickly as possible to reduce additional hazards during the fight.
Use attacks with Destructible Physics to break the cubes, as normal attacks may not work.
Zero moves around the arena frequently, making his position unpredictable during the fight.
His movement can make it harder to land close-range attacks.
Players should use ranged attacks or wait for openings when approaching him.
Stay alert and be ready to react to Zero’s attacks and changing fight conditions.
Keep your distance and look for safe openings to deal damage.